How To Build & Maintain a Hive
This page describes how to construct our unique observation hives, as well as how to install, maintain, and remove them. If you are just starting to plan, then look over the "Get a Hive!" page first.
Copyright © 2017 Classroom Hives Inc
DISCLAIMER
The information provided in our "How To/D.I.Y." Instruction Manual is provided solely for the user’s benefit, so users should read the Instruction Manual fully and carefully before building an observation hive and follow the instructions provided in their entirety, as failure to follow the instructions provided could result in injury to you or damage to your property. Children should always have adult supervision when interacting with an observation hive.
This Instruction Manual is provided “AS IS,” without representations or warranties of any kind. Every effort has been made to make sure that that the information provided in this Instruction Manual is accurate and up to date, and Classroom Hives Inc. is not liable for any damages, direct or indirect, arising from the user’s use or misuse of this Instruction Manual or the information provided therein.
This Instruction Manual is provided “AS IS,” without representations or warranties of any kind. Every effort has been made to make sure that that the information provided in this Instruction Manual is accurate and up to date, and Classroom Hives Inc. is not liable for any damages, direct or indirect, arising from the user’s use or misuse of this Instruction Manual or the information provided therein.
I. Overview: Why choose modular?
There are many styles of observation hives on the market, but most have a fixed size. Smaller fixed ones are often used to display one or two frames (borrowed from a larger hive) in a close, confined space for a few hours as a temporary exhibit. Like our design, the larger fixed ones can last a long time as a permanent exhibit and have an exit tube to the outdoors, allowing the bees to go in and out without entering the room. However, the larger fixed ones are harder to manage because they have to be carefully moved to a safe location every time they need to be opened and modified. Our unique modular observation hive system allows units to be added or removed from a base, meaning the hive can expand as the colony does, similar to how a common Langstroth hive works and how bees live naturally in the wild.
II. Assembly
1. BUILDING BOTTOM BOARD BOX
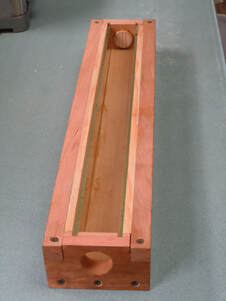
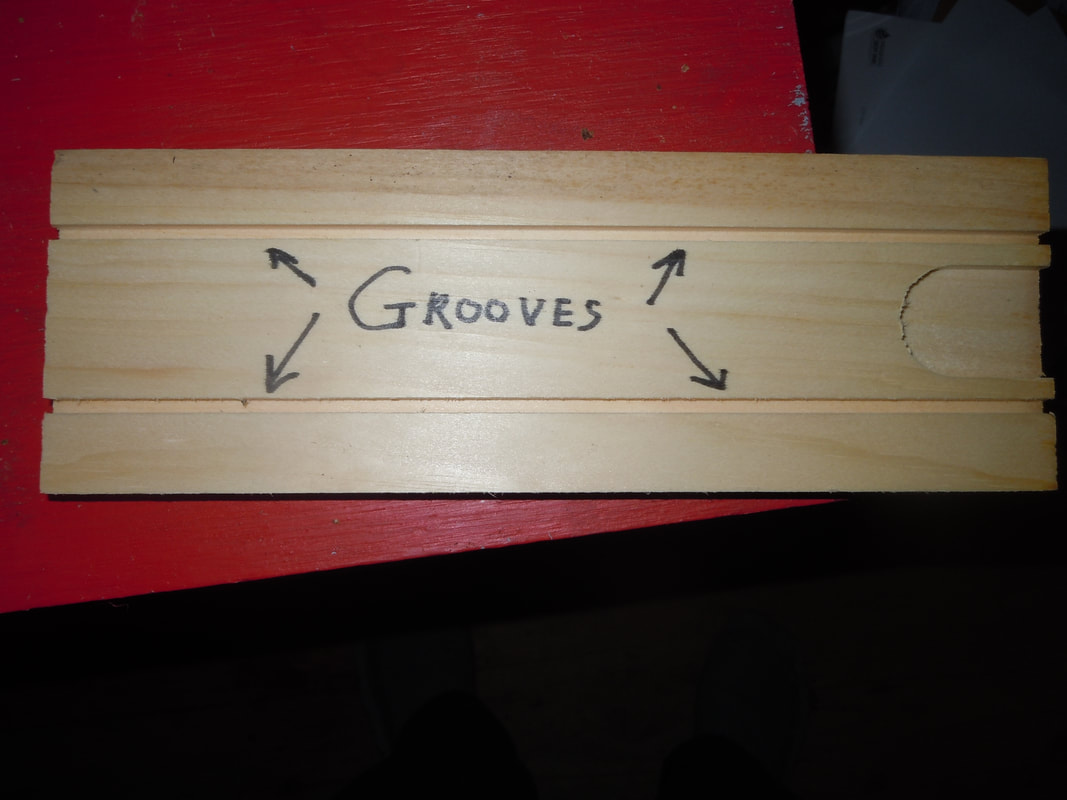
We recommend making a short “bottom board” box on which all the boxes above, called "supers", will rest. There is an entry tube on one end and a port for occasional cleaning on the other. It’s composed of a bottom plank 18-⅝” long x 4-⅛” wide, ¾” thick with the end pieces that are 2½” x 4⅛” x ¾” notched on the top two corners ¾” x ¾”. They support two side pieces 20-⅛”x 1-1/16” x ¾”, notched on each end 5/16”. Before making the individual parts, a 4 ⅛” wide x ¾” board should be cut with two grooves ⅛” thick a ¼” deep and 1-9/16” apart centered on the board from which the bottom and the two end pieces will be made. This saves time because all the grooves are cut once. Before cutting this board into its different parts - the two ends and the bottom board- it is also useful to drill the two 1-¼” O.D. holes of the end pieces. The five pieces are joined together with ten, 1-⅝” drywall screws, (five on each end) that are slightly set in. All pieces that are to be attached should be pre-drilled on a drill press so they attach vertically to the next piece. Note: All the joints can be glued with either Titebond or Gorilla Glue. Once the “bottom board” is assembled, two 1/8” pieces of glass 1-11/16” wide x 19” long are inserted in the grooves as shown.
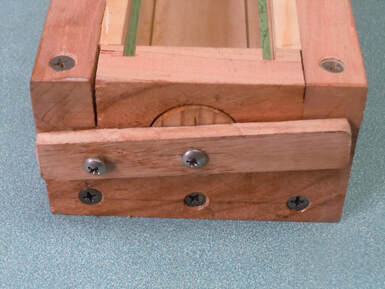
The holes on the end pieces are both 1-¼” diameter. The cleaning hole is closed with a piece of inch and a ½ long, 1-¼” wide dowel with a cross piece that is made of hardwood, ¼”, thick x ¾” wide x 4” long. It is screwed and centered to the middle of the dowel with a #8 ¾” sheet metal screw. It is then attached to the end piece with another #8 ¾” sheet metal screw, horizontally 1-¼” from the center hole of the piece of dowel. Before you screw this in you need to pre drill the hole with a ⅛” bit. There are a lot of screws in that end piece, so you want to avoid cracking it. In lieu of a piece of plastic, a second plug can be made exactly like it to be used as a temporary plug when moving the hive. (If you just use a piece of dowel, it can sometimes slip into the interior of the hive and may be hard to retrieve.)
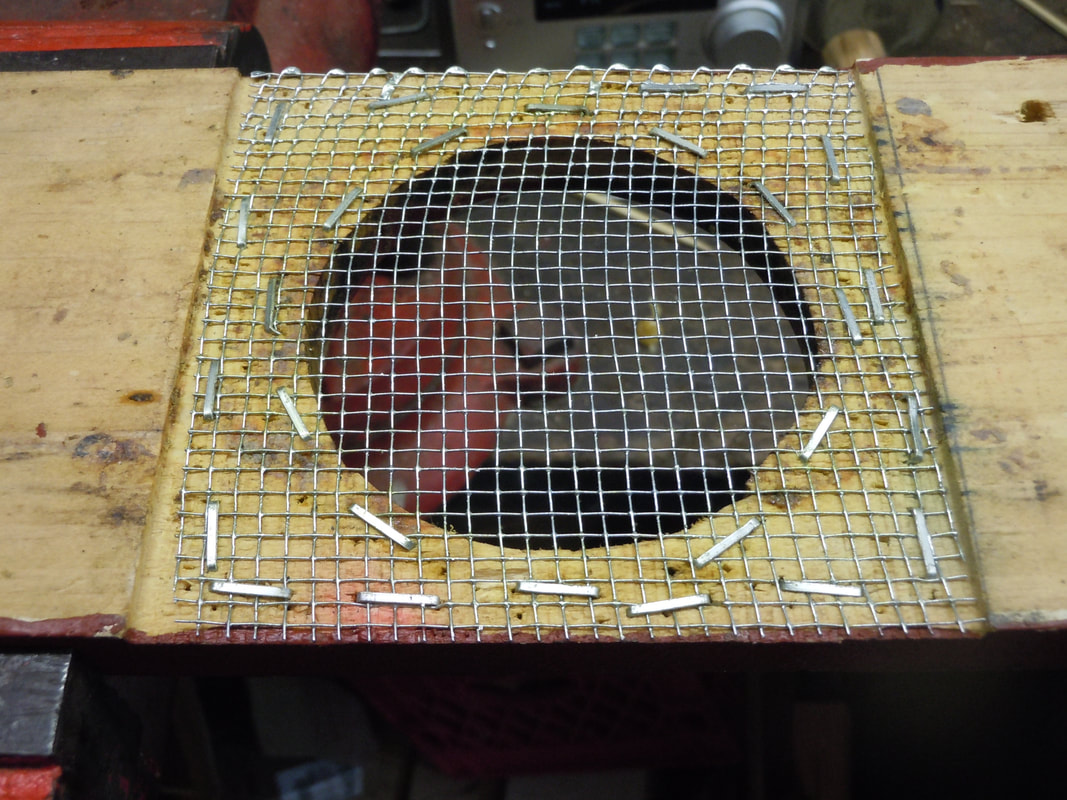
Another feature of the rear opening is that it can be used as a ventilation hole. This can be done by taking a small piece of ¼” plywood, cutting it in the same shape as the end piece. Drilling a 1-¼” hole in the same location as the end piece. Attaching a ⅛” mesh covering the hole, then drilling, again two holes with a ⅛” bit both a 1” and a ¼” horizontally from the center of the opening, on both sides to attach it with #8 ¾” pan head sheet metal screws.
2. BUILDING SUPER BOXES
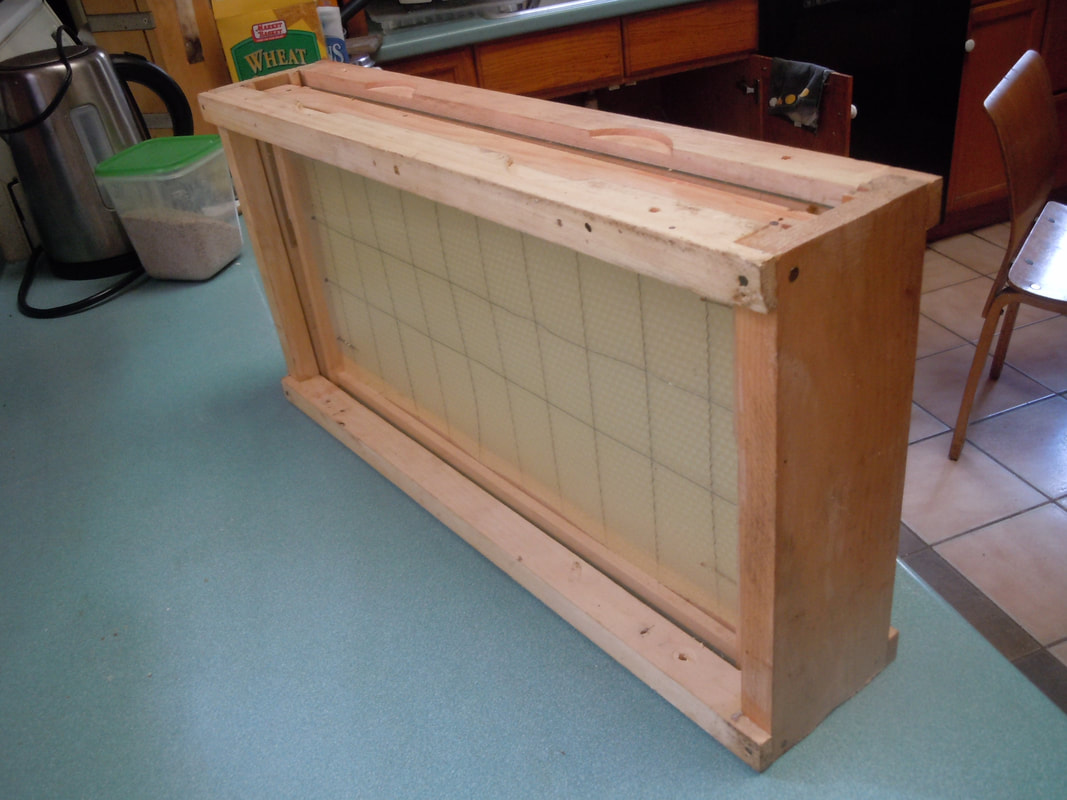
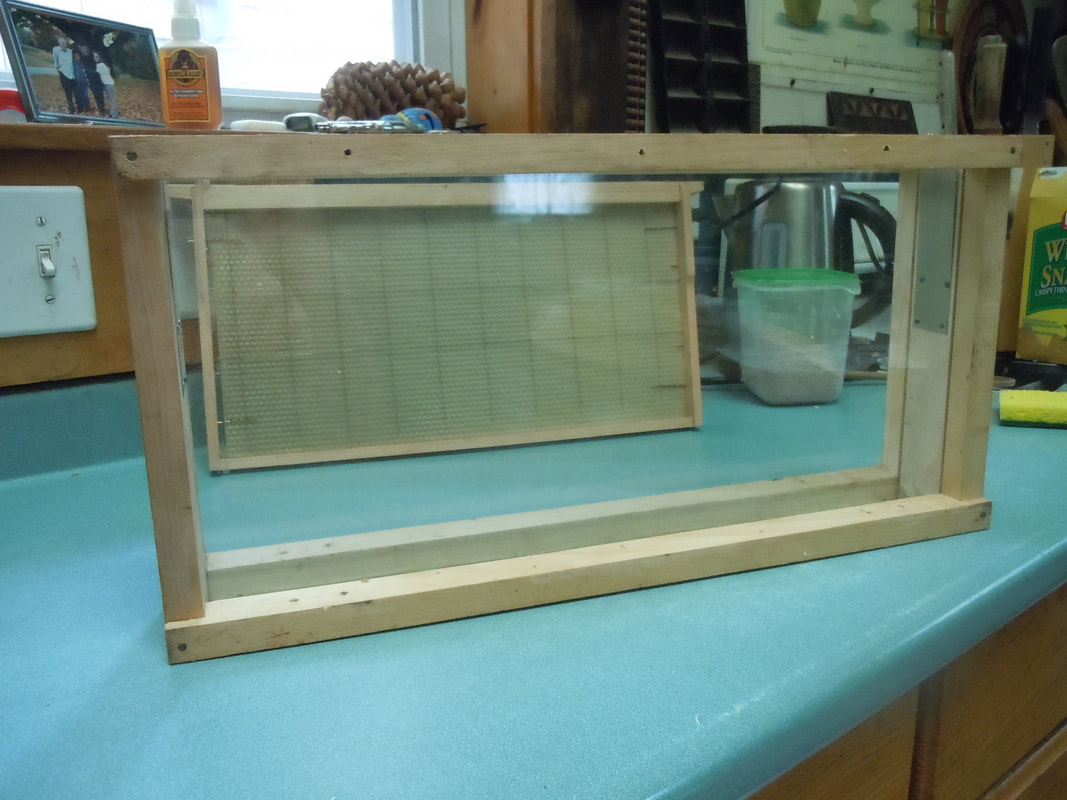
The observation hive super is made of 8 pieces:
There are two pieces of flat metal about 1”x4”. These are to be nailed vertically, about 3/4” down from the top of the ends, across the router-plowed slot. (Use the 5/8” nails). This metal will be the support for your frame in this hive. The grooves on each side of the interior surface , 1/8" wide, and 1/4" deep, are to hold the glass for your hive, so be sure the metal pieces are centered around the slot, and do not interfere with the grooves. This is true when you nail the horizontal pieces that also support the glass.
There are 4 side rails with cuts in the ends. Always use either Titebond or Guerilla glue for each one of these joints. The bottom rails are to be positioned so that the hive ends fit securely in the notched part of the side rail. Use 1” nails.
Take the topside rails and place these to the topside edge of the ends and nail with 1” nails near the ends SO THE NAILS WILL NOT ENTER THE GLASS GROOVES. THIS APPLIES TO BOTH TOP AND BOTTOM RAILS.
Nail two 3/4 x 3 -3/4 metal strips on the bottom of each end. To hold the panes of glass in place. Note: once the bees have entered the hive they will apply propolis to all the sides of the glass panes, which will give them additional strength.
The observation hive super is made of 8 pieces:
- 2 end pieces
- 4 side pieces that holds the glass to the side of the box
- 2 panes of glass 1/8”x91/2”x19,” which you will buy separately
There are two pieces of flat metal about 1”x4”. These are to be nailed vertically, about 3/4” down from the top of the ends, across the router-plowed slot. (Use the 5/8” nails). This metal will be the support for your frame in this hive. The grooves on each side of the interior surface , 1/8" wide, and 1/4" deep, are to hold the glass for your hive, so be sure the metal pieces are centered around the slot, and do not interfere with the grooves. This is true when you nail the horizontal pieces that also support the glass.
There are 4 side rails with cuts in the ends. Always use either Titebond or Guerilla glue for each one of these joints. The bottom rails are to be positioned so that the hive ends fit securely in the notched part of the side rail. Use 1” nails.
Take the topside rails and place these to the topside edge of the ends and nail with 1” nails near the ends SO THE NAILS WILL NOT ENTER THE GLASS GROOVES. THIS APPLIES TO BOTH TOP AND BOTTOM RAILS.
Nail two 3/4 x 3 -3/4 metal strips on the bottom of each end. To hold the panes of glass in place. Note: once the bees have entered the hive they will apply propolis to all the sides of the glass panes, which will give them additional strength.
3. GLASS
The 1/8″ glass recommended by the manufacturer (but not provided) we have found to be the most satisfactory for an observation hive, it is strong, can be disengaged from the supers, and easily cleaned. 3/32″ glass is liable to crack frequently and 1/8 plastic, not easily broken, and therefore often chosen, is quite flexible and can be pushed into the bee space, which disturbs the bees. It does not transfer heat or cold as well as glass and this is important for cooling in the summer. It still can be used if people are especially afraid of the glass breaking.
The 1/8″ glass recommended by the manufacturer (but not provided) we have found to be the most satisfactory for an observation hive, it is strong, can be disengaged from the supers, and easily cleaned. 3/32″ glass is liable to crack frequently and 1/8 plastic, not easily broken, and therefore often chosen, is quite flexible and can be pushed into the bee space, which disturbs the bees. It does not transfer heat or cold as well as glass and this is important for cooling in the summer. It still can be used if people are especially afraid of the glass breaking.
4. BUILDING THE TOP COVER
The top cover that has 2, 2 ¾” holes that will allow introducing feeder jars (water and syrup). As mentioned earlier, the supers with glass on each side come without a cover and have the same interior spacing so that when they are attached to the base, they form additional space for the hive, in the same proportions. Bees can circulate from one container to the other.
The top cover can be moved from the lowest super up to the next one, and to any additional supers there on. The more supers you add, it is still one hive, so you only need one base and one cover, with a minimum of one super, adding on supers as you need.
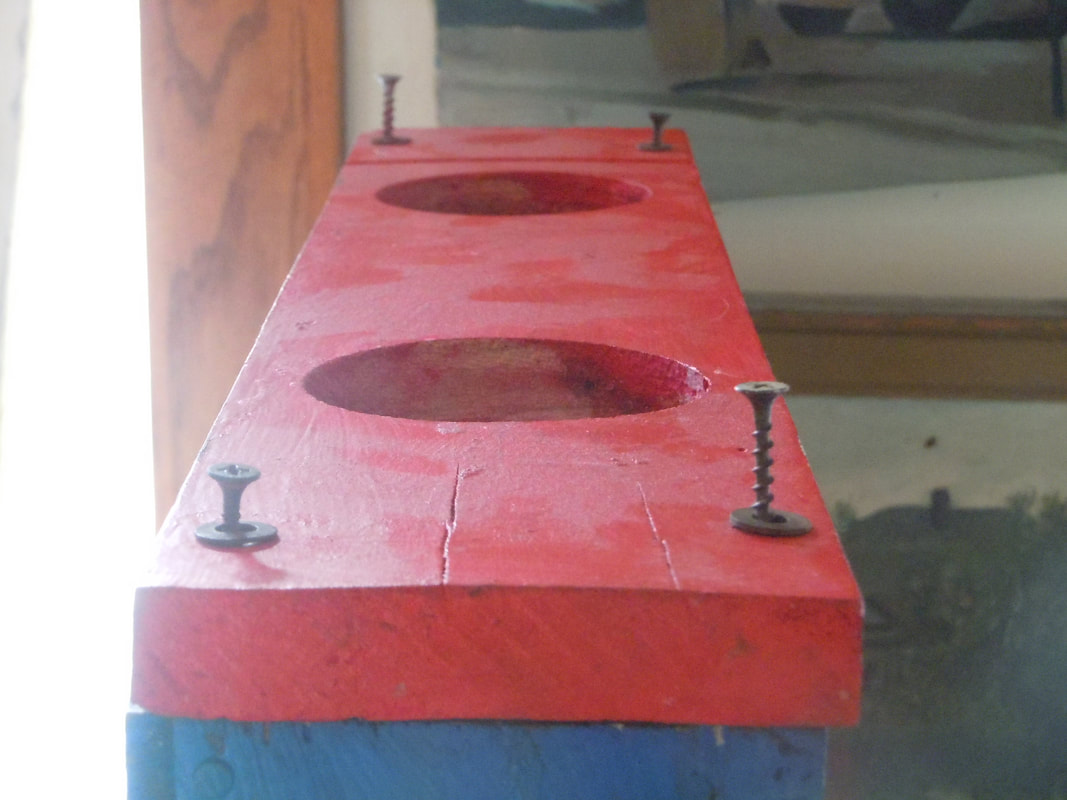
To make your own, take a piece of 1/2” pine cut out a 4 1/8” x 20 1/8”board. Place the 2 3/4″ holes centered on 4 1/8″ width and then the first hole at 5 5/8″ from the end and the second at 14 1/2″ from the same end. We have used a 2 3/4” hole saw for this purpose, but it can get quite wobbly, so a fine blade on a saber saw is an alternative. The cover should be attached with 4, the 5/32” x2” bolts used to hold the supers together, after using the hole jig so they all end up in the right place. It is advantageous to screen the 2, 2 ¾” openings with 1/8″ hardware cloth or screening. After indenting less than a 1/16th of an inch an area around the hole, about 5/8’ away from the edge of each hole. Some screening can be stapled to the bottom of the cover, which can be either covered or not with (except for the 2 ¾” holes) with a 3/32″ thick veneer or plastic, or as in this example with some 3/32″ plastic strips on the indented wood.
The plastic, or metal, separators can slip between it and the bottom container easily. Note that the wood has been slightly indented to allow for the screening Once the screen is in, moving and refilling the jars is quick and easy, but you have to make sure that the lids are close enough to the screen below so that the liquids are available to the bees , if not, they will not receive them. This is a rare occurrence, but if necessary, you can take anything that will absorb a liquid. (Cloth, paper towels etc.) that can comes in contact with both the lid and the screen. Watch the bottles within a day to see if they are dispensing properly’To help this process the holes in the lids should be punched in the middle about the circumference of a quarter. Also It is better to use single piece lids. Those that have parts that screws on with a flat round disc, as in Mason jars, can sometime leak into the hive and cause a mess in the bottom. In the summer, one or both the 2 ¾” holes can be uncovered for better ventilation as they form a kind of channel for circulating air that passes through the entrance tube to the top of the hive. Eventually the bees will propolize the screen so it should be checked periodically. By the same token, even if no liquids are being fed in the winter, they should be covered to keep the hive warm and not let in the outside ambient cold air.
5. SEPARATORS TO MAKE THE HIVE MODULAR
To be able to break down the hive into separate units, without letting out any bees, we have developed a system using separators that we can attach to individual supers so that we can isolate each unit while still containing the bees in them. By these methods it is possible to break the hive down to its components parts and make it unlikely that a single bee will get in the room.
METAL SEPARATORS
The best form of separators are metal sheets (either stainless steel, galvanized steel, or aluminum) 4 ¼” wide x 23″ long with raised ¾” long sides. One of the ends can be raised in the same way, but this is not necessary. Starting from the same end, holes should be drilled at 4″, 10″, 16″ and 20″ in the middle of the raised edges, on each side. (3/8″ up from the edge). Push a piece of ridged wire through the 2 holes at the 20″ mark; place a super up against it. Mark off where the other holes correspond on the super. Pre drill them only a 1/2 “ deep. Insert ¾” screws through the holes and tighten them so that they enter approximately ½” to 5/8″ into the bottom of the super. Be careful, when drilling not to go so far as touching the glass, which might break. Repeat the same procedure for the top rail of the super making sure that the top of the lower super below it, and the bottom of the upper super above it are always covered. To perform this operation:
1. Take out the four 2”x 5/32” bolts that hold the 2 supers together.
2. Then slip the first metal piece in with the sides facing down. The end you are pushing in should be beveled with a file top and bottom because as you push it through to the other end, just before you get there, there is a very thin metal plate that holds the pieces of glass in the slots and sometimes the metal catches it as it comes to the other side. Sometimes it may be necessary to lift up the super very slightly to allow the separator to slip by. Sometimes the metal encounters burr comb but it will cut right through it, even if some resistance may be encountered. Screw the 2 ¾” screws on each side.( you only need to screw in 2 screws even thought there are three holes. The middle hole is just for emergencies. Push the second piece of metal with the sides facing up, and screw the ¾” screws in the appropriate holes. As long as the super is covered, it can be lifted off the bottom one.
PLASTIC SEPARATORS
If no metal pieces are available, here is a method using 3/32″ thick plastic.
1. Take out the four 2”x 5/32” bolts that hold the two supers together.
2. Then slip the first 3/32″ piece of plastic 4″ wide and not less than 23″ long. It should be beveled with a file at both ends as in the case of the metal pieces, because as you push it through to the other end, just before you get there, there is a very thin metal plate that holds the pieces of glass in the slots and sometimes the plastic catches it as it comes to the other side. Again sometimes it may be necessary to lift up the super very slightly to allow the separator to slip by. Also, again, sometimes the plastic encounters burr comb but it will cut right through it, even if some resistance may be encountered.
3. Pick up the second piece of plastic (3/32″ thick, at least 23″ long, and this time 4 5/8″ wide). Attach three pieces of duct tape, about 20″ long with equal lengths protruding from each side, on the underside of the plastic, firmly pressed on. (This is important because if the tape is loose, it will curl up as the two plastic pieces are slipping on each other) 4. They should be attached evenly, one close to each end, and one in the middle. second piece of Plastic with the three hanging lengths of duct tape is inserted. The super is ready to be moved. Occasionally there is so much filled comb between the two supers that the plastic pieces, can be stuck together by the honey that has dripped from the comb. In this situation 2 people should be present while working the hive. One to hold down the bottom piece of plastic and the other to remove the super above, making sure that the plastic piece on the bottom of it stays in place. Otherwise it is possible to inadvertently lift the cover from the super below and let out some of the bees. (Note: In exceptional circumstances, when, for example the hive is very populated, or if you need to take the super that you have removed on a longer trip, then you can use four 20″ strips of duct tape instead of three). With the metal locks, it is not necessary to give any extra support. Be careful how many of the attached frames you separate at a time. Sometimes they can be very heavy, as when they are filled with honey. It is wise to keep the units at manageable weights.
6. CONNECTING MODULAR PIECES (TOP, SUPERS, AND BOTTOM BOARD)
Because it is modular, in the fall, when the population diminishes, the hive can be reduced to two or three 1- frame supers. In the spring, when it augments dramatically, three or four can be added. We never have had more than a six- frame hive. The “supers” have no bottom board and enclose only a single deep frame. When added, they increase the total space available. The cover of the first super is removed and replaced on the top of the added super. By using our system of metal or plastic “dividers”, it can be serviced on location, where it is unlikely that any bees will escape in the room. Therefore the hive does not need to be removed from its location. This saves time besides making the exhibit safer. Another advantage of this type of hive is that, because it is quite simple to take apart, and relatively light weight, it can easily be moved.
Because it is modular, in the fall, when the population diminishes, the hive can be reduced to two or three 1- frame supers. In the spring, when it augments dramatically, three or four can be added. We never have had more than a six- frame hive. The “supers” have no bottom board and enclose only a single deep frame. When added, they increase the total space available. The cover of the first super is removed and replaced on the top of the added super. By using our system of metal or plastic “dividers”, it can be serviced on location, where it is unlikely that any bees will escape in the room. Therefore the hive does not need to be removed from its location. This saves time besides making the exhibit safer. Another advantage of this type of hive is that, because it is quite simple to take apart, and relatively light weight, it can easily be moved.
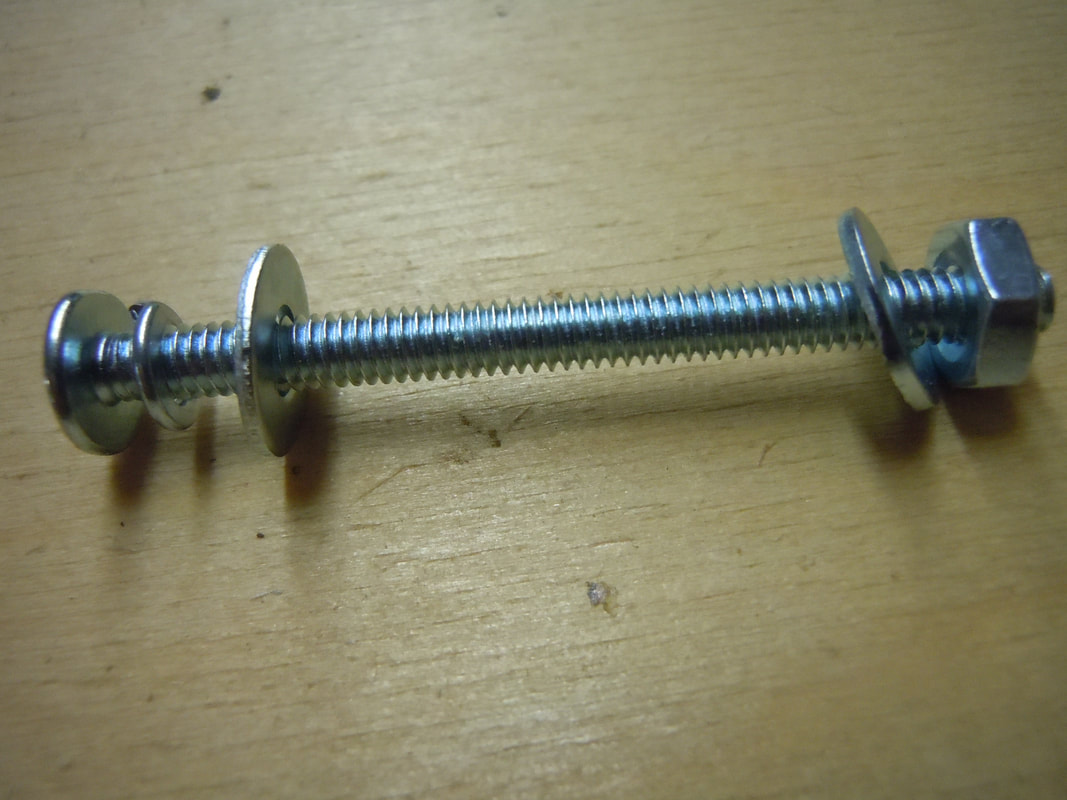
When we join the supers, or any part of the hive together, we use a pre-drilled guide that is the same size as the bottom board (20-⅛”x 4-⅛”x ¾”), and equally of all bottom and top of the supers. It should be made of some sort of hard wood. Drilled vertically on a drill press with four ¼” holes, 1-¾” back from the ends, and ½” from the sides. Use this guide clamped on the identical surfaces on the top and the bottom of each super, to pre-drill each one with the proper holes always in the same relationship to each other. They will accommodate four bolts 8-32, 2" long, with, first a lock washer, then a flat ring washer, then pushed through the two pre-drilled pieces, then a flat washer, and finally the nut. The 8-32 bolt is about ⅛" thick, so it has plenty of spare room in the ¼" hole which gives us some leeway to be sure to align the supers one on top of each other. They can also be used to hold down the hive cover. We have also set up hives using 2" long, ¼" carriage bolts with a flat and a split ring.
Note: When attaching the very narrow “bottom board” to the first super it’s easier not to include the final washer at the bottom before screwing in the nut. The nut is large enough to span the hole and secure the two pieces.
Note: When attaching the very narrow “bottom board” to the first super it’s easier not to include the final washer at the bottom before screwing in the nut. The nut is large enough to span the hole and secure the two pieces.
7. FRAMES
This process is the same as for a Langstrong hive.
EACH FRAME CONSISTS OF:
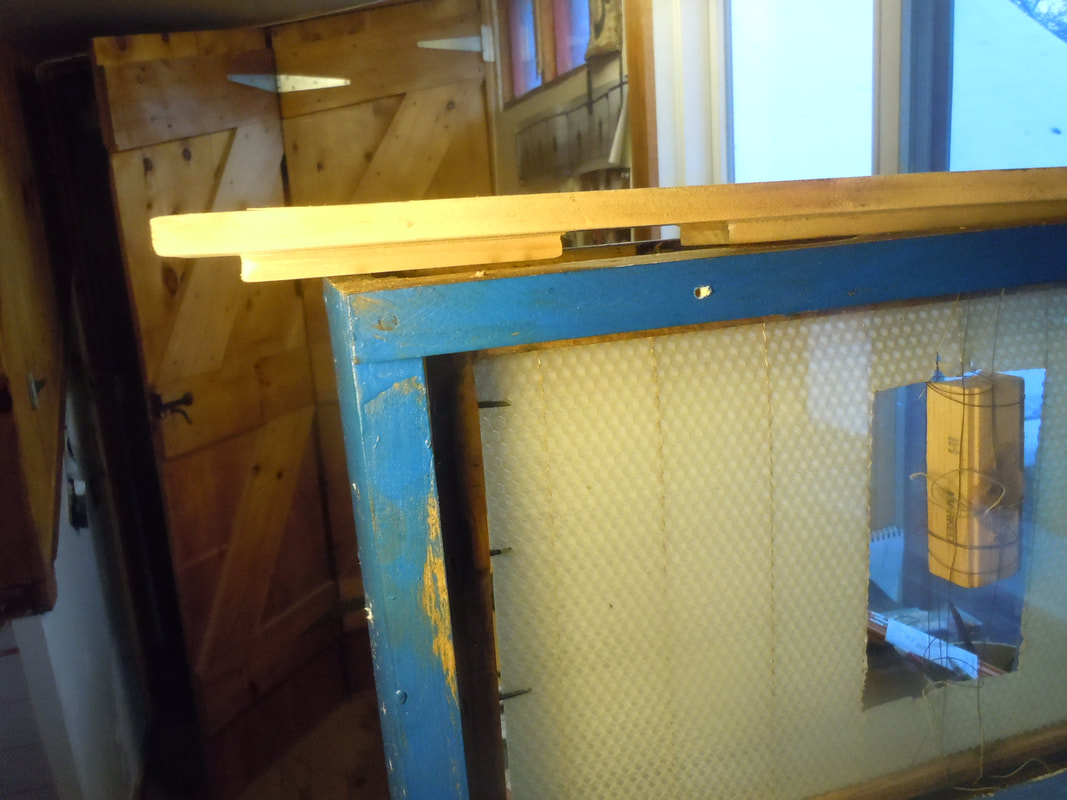
Nail 3/4” nails into the side of the wedge as pictured to hold foundation. There is another type of frame that has a slot on the top bar. There you simply push a wired foundation, without hooks through the slot down to the Bottom bar.
Drive one 1 ¾” nail down through the top bar into each end bar and one 1 ¾” nail through each end bar into the solid portion of the top bar (not into the wedge). Do not omit these last two nails; they are the most important.
Nail the bottom bar in place with two 1” nails in each end driven through the bottom bar up into the end bars.
This process is the same as for a Langstrong hive.
EACH FRAME CONSISTS OF:
- 2 end bars
- 1 top bar
- 1 bottom bar (2 pieces, if bottom bar is divided)
Nail 3/4” nails into the side of the wedge as pictured to hold foundation. There is another type of frame that has a slot on the top bar. There you simply push a wired foundation, without hooks through the slot down to the Bottom bar.
Drive one 1 ¾” nail down through the top bar into each end bar and one 1 ¾” nail through each end bar into the solid portion of the top bar (not into the wedge). Do not omit these last two nails; they are the most important.
Nail the bottom bar in place with two 1” nails in each end driven through the bottom bar up into the end bars.
8. INSERTING FOUNDATION INTO FRAME
It is difficult to remove irregular wax building from an observation hive box, so it's highly recommended that you use foundation on frames and keep the foundation as straight as possible by running two sets of wires running horizontally in the middle of the frame. The two end bars each have four holes to accommodate holding pins or bobby pins for the foundation. For this purpose you can put the pins on the first and the fourth hole. For each 2nd and 3rd hole, nail a 1’ nail, a ¼” away from it, so that the head sticks out no more than 1/8th of an inch. Then take a little more than 2 frame lengths of wire. First wrap some around the first nail, then run it to the corresponding hole on the other end bar, tighten it, then wrap it, once around the corresponding nail, then bring the remaining length of wire, on the other side of the foundation, so you have the foundation sandwiched between the two wires, keeping them as straight as possible.
It is difficult to remove irregular wax building from an observation hive box, so it's highly recommended that you use foundation on frames and keep the foundation as straight as possible by running two sets of wires running horizontally in the middle of the frame. The two end bars each have four holes to accommodate holding pins or bobby pins for the foundation. For this purpose you can put the pins on the first and the fourth hole. For each 2nd and 3rd hole, nail a 1’ nail, a ¼” away from it, so that the head sticks out no more than 1/8th of an inch. Then take a little more than 2 frame lengths of wire. First wrap some around the first nail, then run it to the corresponding hole on the other end bar, tighten it, then wrap it, once around the corresponding nail, then bring the remaining length of wire, on the other side of the foundation, so you have the foundation sandwiched between the two wires, keeping them as straight as possible.
9. THE TEFLON TUBE
The tube can be placed in a hole through a wall or through a hole in a board placed under a window sash (foam rubber, or some kind of blocking can be used to make sure the bees, on their orientation flights, for example, do not come through the opening of the separated sashes). That way the bees can come in and out of the tube without ever coming in the room. If the tubing is deformed and flattened out. Carefully heat it with a hairdryer/heat gun or place it in boiling water and then reshape it. It helps to get or make a container that will accommodate that shape while it cools so you do not need to hold it. It is also important to cut the tube perpendicular to its length so that it's possible to apply a plastic piece to cover it while installing or removing the hive to keep the bees in. To help make a straight cut, wrap a piece of paper around the tube to mark where to cut it.
It is more interesting to viewers to make the tube as long as possible (up to 2 feet is okay) to permit watching bees going out and those laden with nectar, water, and pollen coming in. It should be covered with a transparent, rigid, plastic box so that the tube cannot be pulled out of the wall or hive, accidentally releasing bees into the room.
10. SYRUP
When feeding syrup use a 1:1 water : white sugar by volume (or 1-1/4:1 or 1-1/2:1 when there is a need for comb building). This ratio prevents both mold and crystallization. Make sure the containers are clean.
When feeding syrup use a 1:1 water : white sugar by volume (or 1-1/4:1 or 1-1/2:1 when there is a need for comb building). This ratio prevents both mold and crystallization. Make sure the containers are clean.
11. STABILIZING THE OBSERVATION HIVE WITH STAND OR BASE
Sometimes because of the high location of windows and because some observation hives tend to get tall, it is necessary to build a viewing platform around them to give complete visual access.
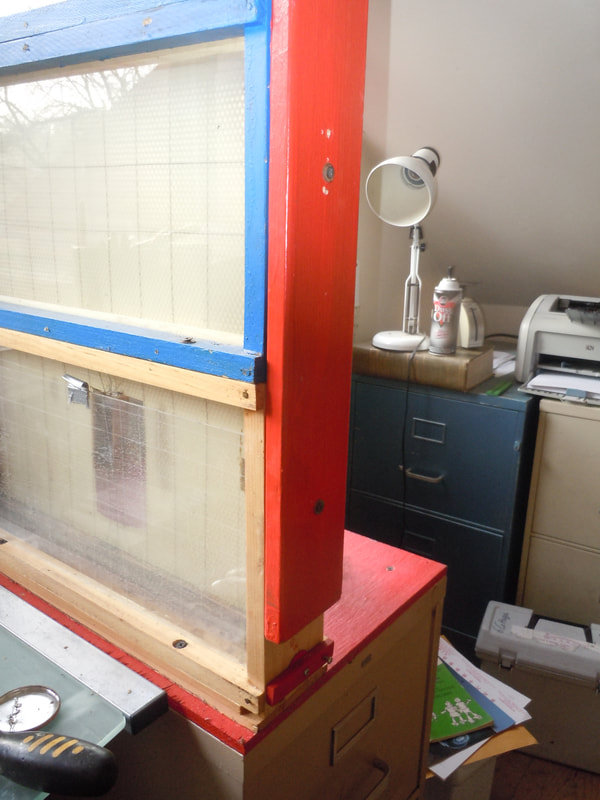
The observation hive must also be attached securely to a table or platform to avoid possible accidents. These should be attached to the floor or wall, or they must be made heavy enough so they cannot be easily moved. A hive more than one frame high should be stabilized by attaching to a frame at its highest point. First the base should be screwed into the table or platform below it. If there are more than two supers, a 1×4 (¾” x 3 ½”) 5’ long board should be attached to the back of each one of the supers (meaning the opposite end of where the tube comes out and above the clean out port) with a 1 5/8″ DW screw about 6″ up from the bottom of the base, and 4″ from the bottom of each additional super. This is because the hive can potentially end up with a base and 5 supers.
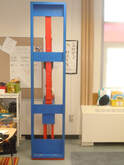
For a “stabilizer,” take two 8’ 2×4" KD studs and cut 24″ off each one (in some instances, when the hive has to be placed on a higher platform, you may need longer 2x4s). The important thing is that the stabilizer can be attached to the top super, so it can keep the hive from being easily pushed over.
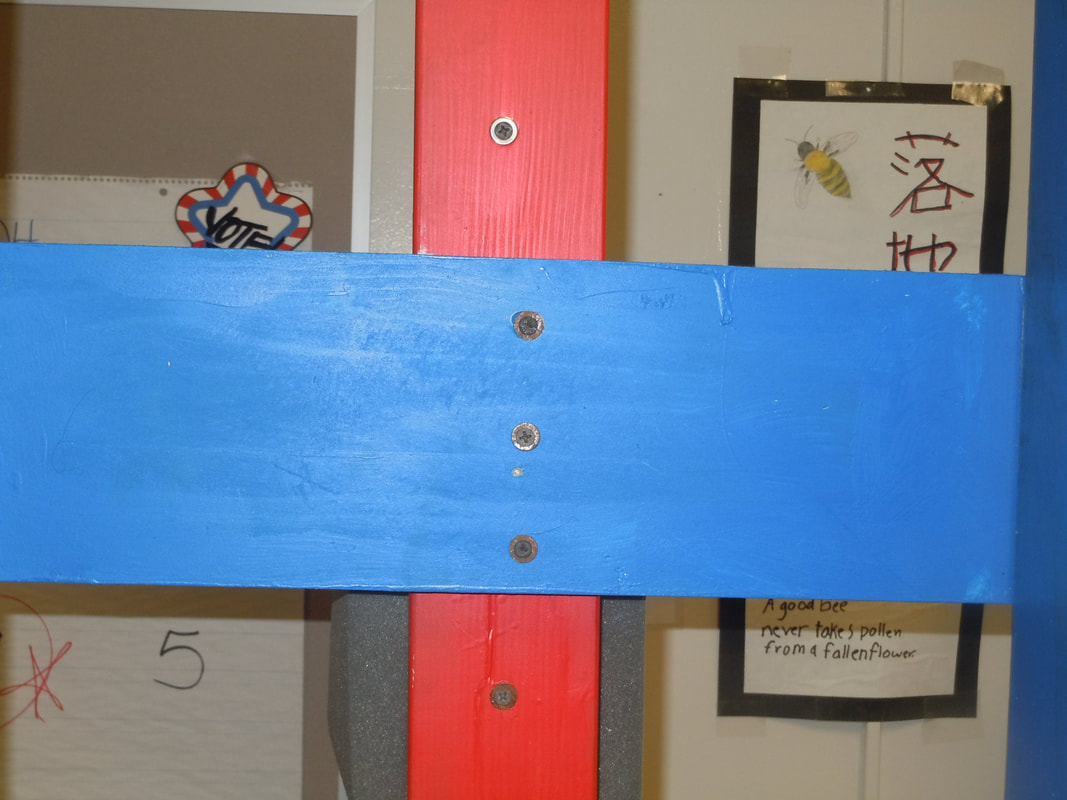
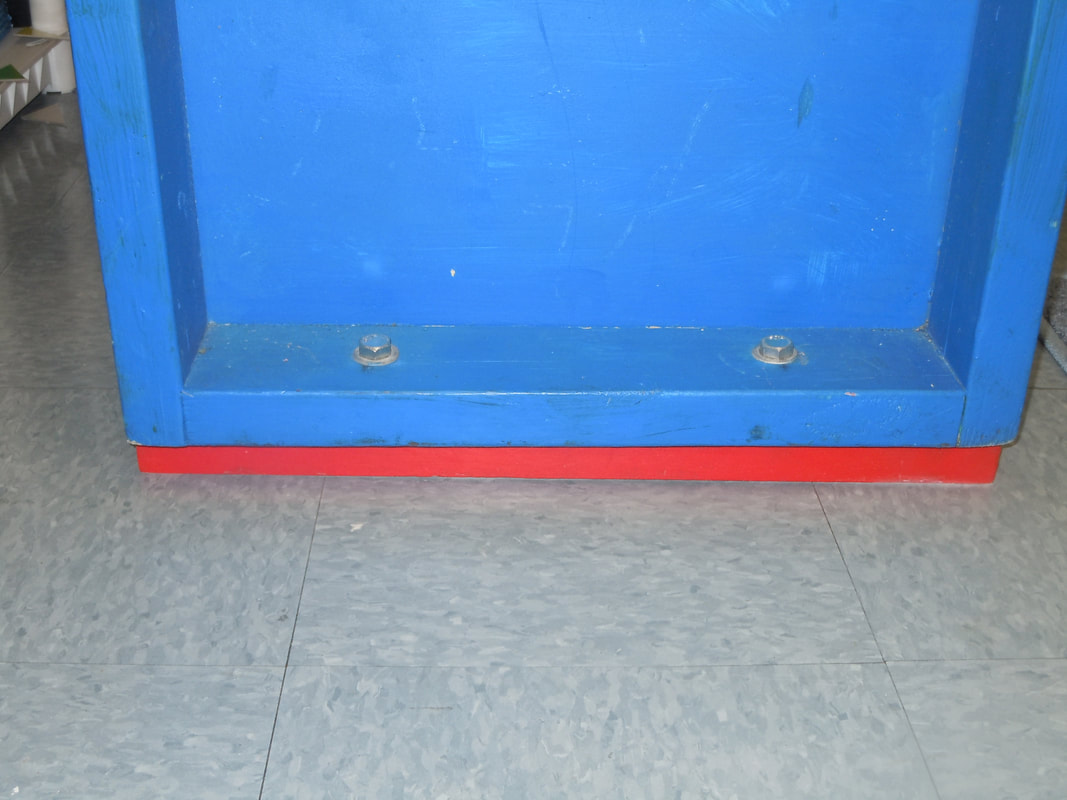
Take a piece of ¾” plywood 2x4 cut it in such a way that you have three pieces 10″x24″ approximately, and one piece about 18″ wide. Place the two long lengths of 2×4 side by side so they are 24″ apart, from outside edge to outside edge Place the two, 24″, 2×4 at each end and nail them into the ends of the long lengths of 2 x 4. Take the 18″ wide piece of ply wood and attach it to the bottom of the structure. Take the remaining 3, 10″ wide pieces of ¾” ply wood and place one at the height of the table, one approximately where your highest super will be located, and one at the very top where the second 2×4 cross piece joins the two vertical 2x4s. Before screwing them on, apply either glue (Titebond or Gorilla glue to the plywood). Attach the four plywood pieces to the 2x4s. With six or eight 1 5/8″ DW screws, three to each side touching the 2×4 (sides, and/or top and bottom). Lift this structure, with the plywood facing the hive. Attach it to the floor, to the platform or table and above through the plywood to the 1x4. When attaching to the floor, it helps to first attach another piece of 2×4 x 24″ directly under the stabilizer to the floor with screws then use two 2 ½” x 1/2″ lag screws to fasten it to this piece. It makes it easier to take it on and off when servicing the hive.
12. DECORATION
On the hive, apart from the glass, most of the surfaces are untreated wood. After a while they tend to get dirty and not look very nice. Just to make this a pleasant spectacle for everyone, it is a good idea to paint everything that has a raw wood surface, either with a transparent finish like polyurethane, or some lively colors. DO NOT paint any surfaces that would be inside the observation hive.
On the hive, apart from the glass, most of the surfaces are untreated wood. After a while they tend to get dirty and not look very nice. Just to make this a pleasant spectacle for everyone, it is a good idea to paint everything that has a raw wood surface, either with a transparent finish like polyurethane, or some lively colors. DO NOT paint any surfaces that would be inside the observation hive.
III. Introducing Bees, Installation and Removal
1. INTRODUCING BEES TO AN EMPTY OBSERVATION HIVE
There are different ways to do this: capturing a swarm; buying 1 lb. of bees and a queen; we prefer getting already developed frames of brood, and adding a queen. This is a relatively simple operation: Get 2 healthy brood frames from a beekeeper, in exchange for two of the new ones that you have assembled. Place them in the supers, or the one above. buy a queen (I prefer to pay a little extra for a “hygienic” one) put her within her queen cage in the third super above and let the bees do the rest. The “hygienic” queens are an alternative to adding chemicals to try to protect against various problems like Varroa Destructor or various viruses. We never add any chemicals to our hives.
In recent years because of pesticides and the varroa epidemic, finding healthy frames of bees have been more and more difficult.
Unless you have a good source of healthy bees , we recommend you start your own, regular full size deep Langstroth hive with package bees that you medicate before hand. First with oxalic acid when they are in their “phoretic” STAGE i.e. the colony does not have brood yet, and only the adult bees have parasites, then use formic acid when they have brood.
2. ADDING BEES TO AN EXISTING COLONY
After trying traditional methods, like the newspaper method, with rather mixed results, we have found an excellent procedure to achieve this. From any hive take a frame of brood, mainly sealed, remove all the live bees by brushing them off, and insert it into an empty super. Keep this super well insulated before introduction into the hive. Then place it above the existing brood area of an observation hive. Even after introduction, be careful to keep it warm. It is a good idea to put some insulation on it until it gets populated with bees from the brood chamber. The bees will readily accept the newcomers and the population will increase.
In recent years it has been increasingly difficult to find frames that have not been weakened by varroa and pesticides. So we have changed our strategy of always working uniquely with Observation Hives, and getting frames donated by others. Now, we recommend, starting your own, regular deep super Langstroth hive with some package bees and first testing them by the confectionary sugar method: (F]Powder Sugar Roll For Varroa Mites on Honey Bees. – UGA CAES). With this method, the affected sugar coated bees can be returned to the hive and survive. Other methods, using alcohol, for example, means that the selected bees for the test will die automatically. If the bees are infected significantly with varroa, and if the hive has not yet developed brood, and the bees are in their “phoretic” stage, then using oxcalic acid, squirted with a syringe between frame is a good way to start medication. ( see instructions on applying this treatment) Once brood has developed then it is advisable to use formic acid.
After a couple of weeks have gone by then it is possible to start an observation hive with new healthy frames from the Langstroth. This said, once the observation hive is established, every effort should be made to keep it going, as opposed to destroying it and putting the bees back in the larger hive, just for convenience. Our experience has been that small colonies can be made viable, and therefore should not automatically be destroyed.
3. TRANSPORTING A HIVE
The hive should be kept upright as much as possible when traveling. It should be kept in place using the insulations as cushions against say a heavy toolbox, or with bungee cords. It should be moved at least two miles away to avoid having the foragers return to their original sites. If this is not possible not all the population will be lost probably (at the most a third) because the house bees have not been oriented to the old location. Another option is to place an obstacle like plant stems in front of the opening which will force the foragers to re orient themselves to that particular location.
The hive should be kept upright as much as possible when traveling. It should be kept in place using the insulations as cushions against say a heavy toolbox, or with bungee cords. It should be moved at least two miles away to avoid having the foragers return to their original sites. If this is not possible not all the population will be lost probably (at the most a third) because the house bees have not been oriented to the old location. Another option is to place an obstacle like plant stems in front of the opening which will force the foragers to re orient themselves to that particular location.
4. INSTALLATION
Before starting:
Version 1 (easier):
(See the longer "Version 1" video below.) The hive should be in two separate pieces: 1) an empty bottom board and 2) the hive supers closed on the bottom with a metal separator. Insert the entrance tube to the open hole of the empty bottom board box. Then place the enclosed observation hive supers on top of the bottom board box. Next, remove the separator from the bottom of the hive supers. Finally, attach the supers to the bottom board and secure the entire hive to its stand/base. Some forager bees will immediately enter the bottom board box and exit the tube to begin orientation flights.
Version 2:
(See the shorter "Version 2" video below.) In this instance, the entire hive is all in one piece and a plastic separator is being used to block the entrance hole to the bottom board. Line up the entrance tube to the hole in the bottom board. Then quickly remove the plastic separator covering the hole and slide the tube in. Done quickly and carefully, no bees will escape.
Before starting:
- The hive stand/base and entrance tube should already be in place.
- Windows in the room should have adequate screening when open.
Version 1 (easier):
(See the longer "Version 1" video below.) The hive should be in two separate pieces: 1) an empty bottom board and 2) the hive supers closed on the bottom with a metal separator. Insert the entrance tube to the open hole of the empty bottom board box. Then place the enclosed observation hive supers on top of the bottom board box. Next, remove the separator from the bottom of the hive supers. Finally, attach the supers to the bottom board and secure the entire hive to its stand/base. Some forager bees will immediately enter the bottom board box and exit the tube to begin orientation flights.
Version 2:
(See the shorter "Version 2" video below.) In this instance, the entire hive is all in one piece and a plastic separator is being used to block the entrance hole to the bottom board. Line up the entrance tube to the hole in the bottom board. Then quickly remove the plastic separator covering the hole and slide the tube in. Done quickly and carefully, no bees will escape.
5. THE OPERATION IN REVERSE: REMOVING A HIVE FROM ITS LOCATION
(See video below.) Because bees are diurnal animals, they should always be moved after sunset, when they presumably have all returned. Less bee movement and forager traffic in the tube will also make the process easier for the beekeeper. Unfortunately, because bees use the sun to navigate, after the sun has set, they can't return home. Sometimes especially in warm weather, some bees will return the next day or be caught in the tube. These bees will have to be sacrificed since they cannot live outside the hive. If doing this during the day when there is lots of activity, it may be easier with 2 people.
First, unscrew the hive from its platform and support. If possible, insert and attach two dividers- one on the bottom super frame and one on the top of the bottom board box in order to remove the supers as one closed unit for transport. This will also make subsequent steps easier, since manipulating the bottom board box alone is easier than the whole hive. Otherwise, simply keep the supers attached and proceed with the hive as a whole. In this case, it may help to have 2 people, where one simply supports the hive to prevent it from tipping. (The video below does this step- removing the supers first and then removing the bottom board box.)
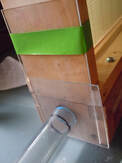
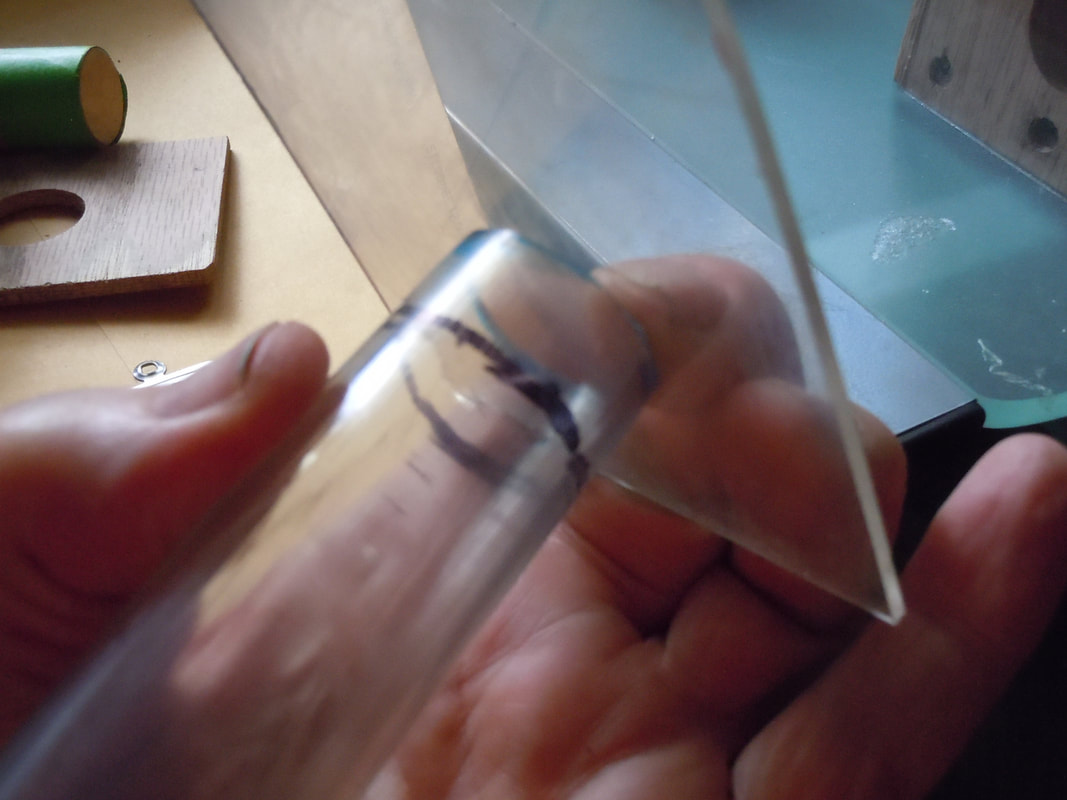
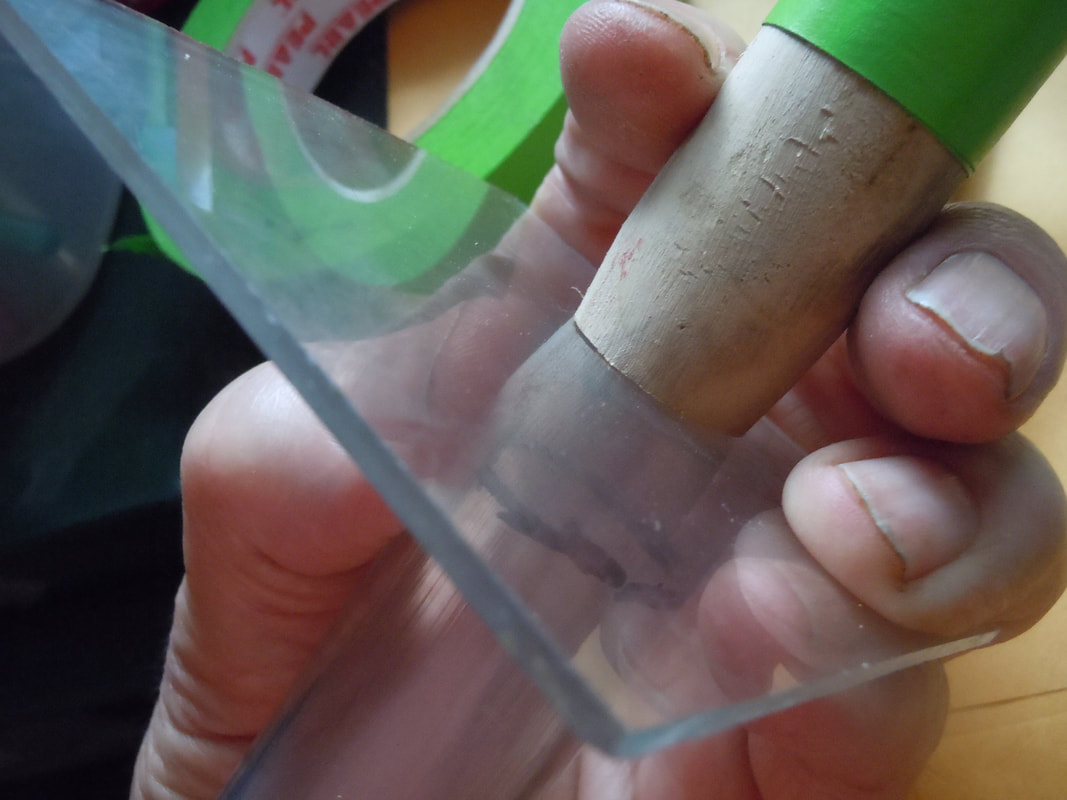
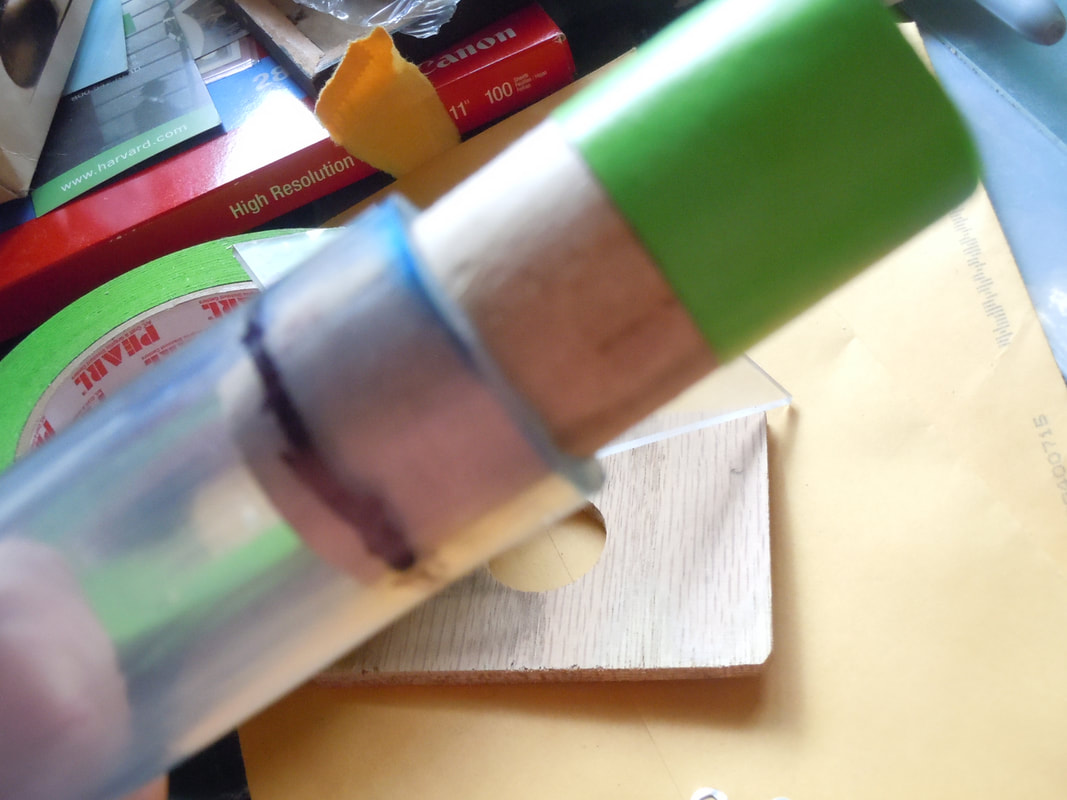
Next, pull the exit tube just barely out the bottom board box and QUICKLY place a piece of plastic 3 ½”x 5” x 3/32” between the tube and the bottom board hole (tape it to the bottom board box at some point). Next insert another piece of plastic and tape it to cover the tube opening to prevent potential bees in the tube from entering the room. Move the bottom board box out of the way. Optional: You can then replace these pieces of plastic with 1″ O.D. stopper. Simply place the stopper on top of the plastic, centered on the tube opening and then remove the plastic to quickly and insert the stopper. In a few days, any bees abandoned in the tube will be dead. Use a 3/4" dowel to push them out.
IV. Maintenance
1. WHO MANAGES?
In our case we have had a strict division of labor. The beekeeper has taken full responsibility for the hive, to relieve any pressure on the teachers (who already have a heavy work load). Another option is having a teacher, or someone else, who is particularly interested in the bees; take over the job of managing them. The work entailed, once the hive is set up is relatively simple and not time consuming. Depending on the circumstances (where the school is located) Classroom Hives may be able to give a course of instruction to those who are interested.
The hive should only be serviced i.e. reduced or increased in size by the beekeeper and assistants. No one else should be in the room while this takes place. Although our system is very good, it is not perfect. Occasionally, in the process of working the hive some bees do get into the classroom. Initially , if there is a sudden disruption, and bees start coming out in numbers, like the top cover suddenly coming off, they will sting the person managing the hive, who is the closest. Most of the time, though, because they are attracted to light, (they are phototropic,) they will head straight to a window and/or to an electric light. If, in daylight you turn off the electric light, they will all end up on the window. At this point you can either let them out if the window can be opened. Or you can kill the few individuals by crushing them on the glass because it is unlikely (unless they are foragers) that they will ever be able to find their way back to the hive, and they cannot survive long outside of it. At this point there is no danger that they will attack you as they are still trying to reach the light.
2. THERMOREGULATION
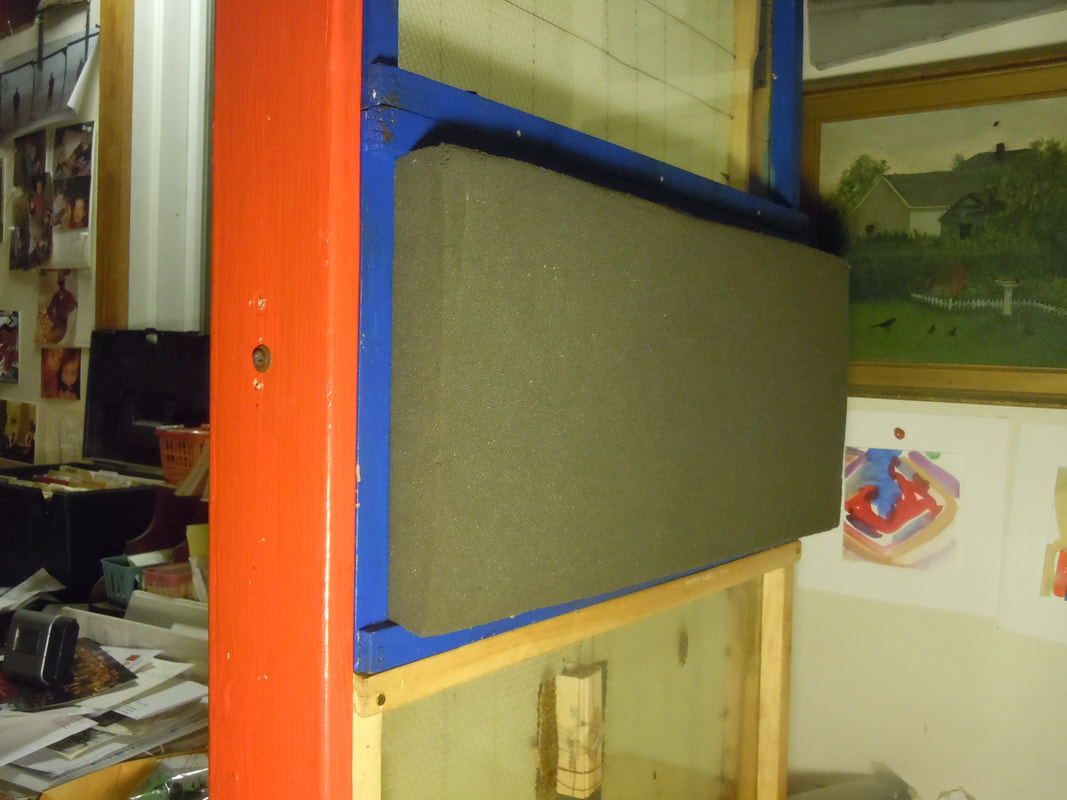
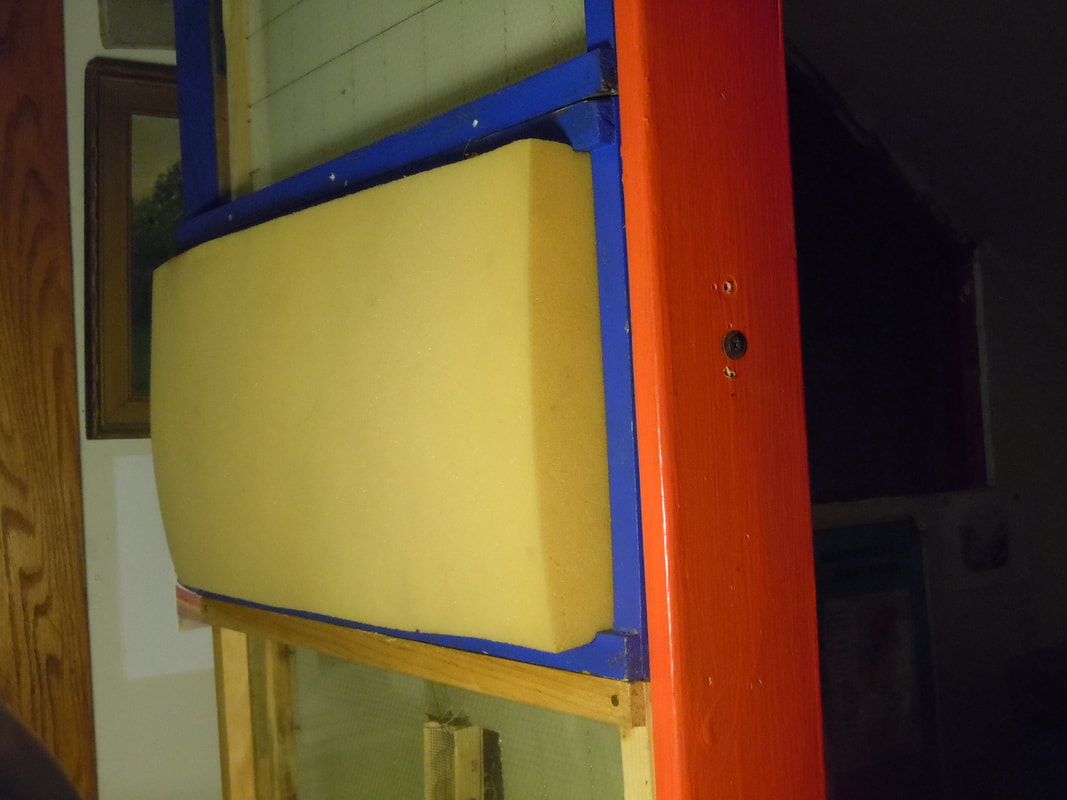
One aspect of maintenance that anyone can help with is monitoring and assisting the hive's thermoregulation. It is the single most important intervention that makes it possible to maintain observation hives: helping the bees manage thermoregulation. This is true both in hot and cold weather. The European Honey Bee (Apis mellifera) evolved ways to maintain temperature within its cavity at 35°C (95°F) within extremes of cold and heat. In cold weather, these small colonies, because each frame is isolated in a single super, do not benefit from the survival strategies of a normal hive: a critical mass of population, interspersed in six to ten frames in the form of a spherical cluster that generates plenty of heat. Therefore the bees should be insulated most of the time. The room temperature affects the glass. So depending on how cold it is, effects the hive. If there are no bees on a particular super we usually leave it without insulation, and it acts as a heat exchanger between the warmer inside room and the cold air coming in. Often a small flattened cluster is formed which, when the glass is covered on both sides with insulation, is able to keep itself warm by only exposing the very edge of it’s circumference to the cold. We use either 2″or 3″ rubber foam insulation (depending on the need)applied to the glass surface, cut 1/8″ wider on 2 sides so that it will fit snugly into that space and be held there by the slight compression of the frame.
We have found that with the application of enough insulation, and maintaining a large (6000) population, we can reproduce the condition of a normal cluster, where the queen can lay eggs, and the colony raise brood even in the middle of February by being able to reach the proper temperature of 35◦C, 95◦F. This has happened only twice, but we have seen that it can be done. This was done first with an observation hive that was one cabinet with 2 large pieces of glass holding 4 deep frames, so the 2″ insulation covered the whole 2 frame brood area. With hives where the boxes contain just a single frame. then it would make sense to cover the wooden horizontal parts of each box with insulation also.
We are still fine tuning this system. The idea is that the single frame in an observation hive, should reach the same temperature as the central frame in an eight or ten frame cluster. That is why both sides of the glass should be insulated.
In warm weather,we have been running tests. we have found that if the temperature read on the outside surface of the glass immediately under the insulation of a brood area read up to 95◦F (35◦C), (96◦F) (35.5◦C),(97◦F) (36○C) without the bees appearing at all agitated, then the insulation can be left on. If, on the other hand, the bees rush about everywhere, then that is a clear indication that they are not able to cool the space fast enough. At this point the first option is to remove one side of the insulation. If that has no effect, then remove the insulation on the other side. If both of those moves fail to alter the situation, then water should be sprayed on the outside surface of both glass sides. Finally as a last resort, a fan should be used on the glass that has been sprayed,( one side is enough) which will lower the temperature even more. In short the beekeeper should keep an eye on the relationship between the insulation and the temperature of the brood underneath. If it remains stable for, let us say an hour, (we still do not have a precise figure for the exact time that we need to assure that the hive can be left with a certain thickness of insulation), then it can be left indefinitely– unless outside factors change.
Foam rubber companies have the tools to do this easily, but otherwise a sharp knife and careful measurement will do. In warm weather, after it has dispersed its population, the Observation hive is deprived of another temperature regulating strategy: having a multi frame brood area containing many cells they can fill with drops of water to cool by evaporation. To compensate a fan, (or 2 if the temperature in the room gets above 90°F (32.2°C), directed at the brood frame will keep the hive from overheating, by cooling the surface of the glass directly in front of it.
We have found that the use of the fan is rarely necessary, This year, (2017), we had a break through. We found that even in a room at 80○F ( 26.6○C) we were able to keep the 2″ insulation on both sides of the brood area. Even if the temperature went up to 97○F (36,1 ○ C) without any undue effect. A useful tool for this purpose is an infrared thermometer (such as the Nubee, NUB8380H).
Measuring temperature is then very important when managing observation hives. Just placing your hand over the bees in the brood chamber is a quick way to check the hive. If it feels warm, it’s a good sign. It means the correct brood temperature has been reached. In cold weather if there are no hot spots, on the other hand, it could be a bad sign, or it may mean that since the queen has stopped laying, the cluster may have gone cold for a while. The temperature must be rechecked. If after 24 Hours there is no change, then there may be a problem.. It usually means that the hive is not getting enough food, because normally most of the heat comes from what is generated from digestion of honey or sugar syrup. Sometimes the hive is just momentarily cool, so be careful not to rush to judgement. Make sure that there is an adequate food supply, and that it is getting to the bees, then wait a day or 2 and test again. If there is still no results, then shake some sugar syrup through the screen, and see the bees react and warm up. If they do not move, then you can assume they have died.
In warm weather, if the temperature goes above 94°F (34 °C) then the hive needs to be cooled by a fan, but this is not frequent.
There are devices that are very useful in measuring temperature in the observation hive. They are easily available on line, or in retail stores like Home Depot. The less expensive ones are fine for our purposes: To locate where and how much of the brood area shows heat. A laser infra red thermometer is in the form of a pistol that aims a laser beam on any surface and then gives you the temperature of that spot. The laser gun can also be used to measure other temperatures for comparison purposes.
For example:
1. Temperature outside the brood area.
2. Temperature in the room where the hive is located.
3. The outside ambient Temperature.
It should only be used by the beekeeper, the teacher, or someone responsible on very limited occasions while managing the hive, because the laser beam can be dangerous to eyesight.
3. CLEANING
If the glass is stuck, plunge the super in a tub of warm water and the glass will loosen up. Wood can be cleaned with denatured alcohol to kill foulbrood diseases. Brood frames that are three years or older should have the comb removed. All others, particularly if they have drawn comb should be kept. For the bees, it is a big advantage not to have to draw out new comb. Wax is expensive. It takes six parts of honey to make one part of wax.
Use boiling water to clean propolis off wood:
4. USING THE PORT TO CLEAN OUT THE BOTTOM BOARD
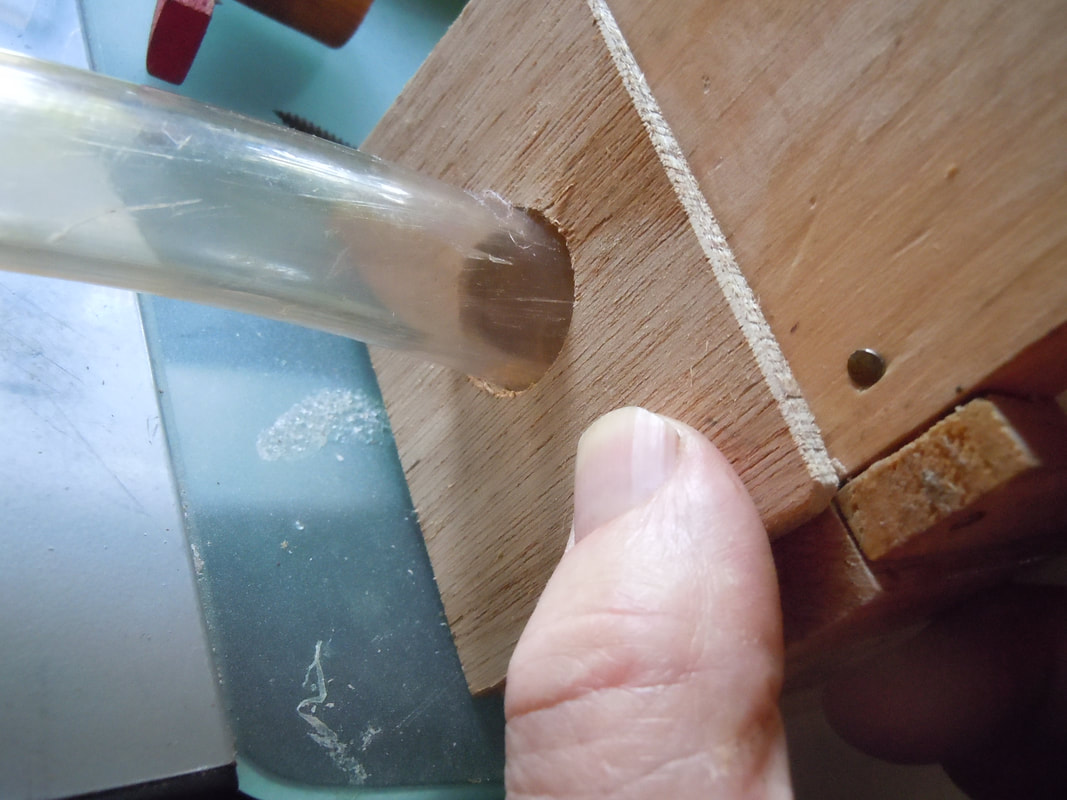
The 1 ¼” port opening on the other side of the entrance tube has many uses. Once the stopper is pulled out and the small 3×3” piece of plastic has been placed over the port hole, cover it with another small piece of plastic or wood that has a 1″ O.D. hole in it. Put a 1″ O.D. tube attached to a vacuum cleaner up against it. Take out the first piece of plastic and then introduce the tube. The purpose is to clean out dead bees that may have accumulated or wax moth larvae.
The 1 ¼” port opening on the other side of the entrance tube has many uses. Once the stopper is pulled out and the small 3×3” piece of plastic has been placed over the port hole, cover it with another small piece of plastic or wood that has a 1″ O.D. hole in it. Put a 1″ O.D. tube attached to a vacuum cleaner up against it. Take out the first piece of plastic and then introduce the tube. The purpose is to clean out dead bees that may have accumulated or wax moth larvae.
5. ABSCONDING VS SWARMING
When a hive absconds, most or all the bees leave the hive in a mass. This may happen for several reasons, but for observation hives it is most likely that the hive has suddenly become too hot over a long period of time, and their traditional strategies of bearding, ventilating, and water evaporation do not work. Once they leave the hive, they act like a regular swarm and send scouts to find a new location to move to. In this operation they leave few bees behind—maybe just a few hundred.
SWARMING
It is amazing to think that a small hive of 7000 bees would swarm, but it does. This is because when the small space it occupies is overcrowded, since honeybees cannot, like other eusocial insects augment the space available to them, the population must divide: half or more of the bees must seek shelter elsewhere. Like any hive, they will start forming queen cells. If it is an emergency situation, where a queen has inadvertently been killed, the (queen) cells will appear on the surface of the brood comb. But, normally, swarm cells appear at the bottom of a frame, Which is often a harder place to see in a modular observation hive that we use. The same techniques to stop swarming that are used with larger hives apply here also.
1. Introducing drawn comb above the brood frame.
2. Reversing bottom and top brood frames.
3. Least useful, adding a frame of undrawn, new foundation above the brood frame.
If there is a possibility that queen cells exist, then the supers with brood should be taken to a safe place, and after putting on protective clothing, they should be examined and, if found , they should be destroyed. Unless you decide to breed a local queen. After swarming, half to a quarter of the population, a substantial number to the eye, should remain. Even so there should also be a noticeable change in the overall number . The new queen will be hard to find at first because she will not be marked, but keep looking, In the beginning she may be small and puny, but later within a week, as she starts laying, she will be fat and massive. If you start noticing eggs and larvae, no need to look anymore, even if you do not see her, she is there. The important thing is not to panic and rush to order a new queen, because if you do, she will invariably be dispatched by the present occupant.
6. EMERGENCIES
In the sixteen years that we have had the hives, we have never had a situation where a major glass break occurred. Should it happen, the first thing to do is to get the people away from the hive, and then out of the room. After that, the door of the classroom should be closed until the beekeeper arrives to deal with the situation. A prearranged protocol should be set up, like a fire drill, to move the students to a safe location. This is because the bees will take a defensive and attacking stance right next to their home. Further out they will fly around confused and head for the windows and the light.
In the sixteen years that we have had the hives, we have never had a situation where a major glass break occurred. Should it happen, the first thing to do is to get the people away from the hive, and then out of the room. After that, the door of the classroom should be closed until the beekeeper arrives to deal with the situation. A prearranged protocol should be set up, like a fire drill, to move the students to a safe location. This is because the bees will take a defensive and attacking stance right next to their home. Further out they will fly around confused and head for the windows and the light.
V. Conclusion
In the many years that we have operated the observation hives, our challenge was to make them safe for use in a classroom. Only then would everyone be able to freely enjoy this wonderful exhibit. In all that time, only one student was ever stung (a bee flew in a nearby open window and sat in a pair of headphones that a student then put on!). To achieve this, besides the instructions on how to build and manage the hive, we have come up with the following requirements.
1. Notifying the school authorities about the project.
2. Notifying the parents of the existence of the hive. Informing them of the safety and benefits of the exhibit.
3. Identifying who in the school community is allergic to bee stings, and making sure that the antidote is available in the school pharmacy. (It usually is part of their standard equipment)
4. Hives should be serviced by whoever is responsible for it and her/his assistants. No one else should be present in the room while this takes place.
5. Making sure that the room with the beehive has proper screens on its window.
6. Establishing Protocols for Emergencies (akin to Fire Drills) where the students in case of danger will be lead out to a safe, prearranged location.
7. Establishing Protocols for managing the hive: Identifying who is ultimately responsible, with readily available information on how to reach them.
8.Posting the location of the hive in the building. Making sure that the proper procedures outlined above are followed.
These procedures have been designed to deal with safety problems that came up in the past. They should be followed; we are always open to any suggestions that might make them better.
DISCLAIMER
This information is provided solely for the user’s benefit. It is provided on an “as is” basis without warranty of any kind. Classroom Hives Inc. will not be liable for any damages, direct or indirect, arising out of your use of information provided here, or information provided at any other site that can be accessed from this one.
This information is provided solely for the user’s benefit. It is provided on an “as is” basis without warranty of any kind. Classroom Hives Inc. will not be liable for any damages, direct or indirect, arising out of your use of information provided here, or information provided at any other site that can be accessed from this one.
